Painting Basics: Dry Brushing
The first 28mm miniature I painted was a lizardman from the 5th edition Warhammer Fantasy boxed game. I no longer have that model, but I remember it taking me ages to paint because I had no idea what I was doing. Soon after, I got myself some chaos warriors and started dry brushing.
Dry brushing is a simple highlighting technique that provides quick results. I’ve often heard it described as a technique for amateurs, looked down on by elite painters, but I don’t care. It got my chaos army battle ready in a fraction of the time it took me to paint the lizardmen from the boxed game.
Before you Start
Dry brushing ruins brushes. Whenever one of my brushes becomes too tatty to use for blending or detailing, it goes in the dry brush pot. Use new brushes for dry brushing at your own risk. Don’t say I didn’t warn you.
Why Dry Brush?
Dry brushing is a quick way of highlighting raised surfaces to create light and shadow effects. Combined with other shading techniques (refer to my article on washes for more information), it can quickly bring extra depth to a model’s paint job.
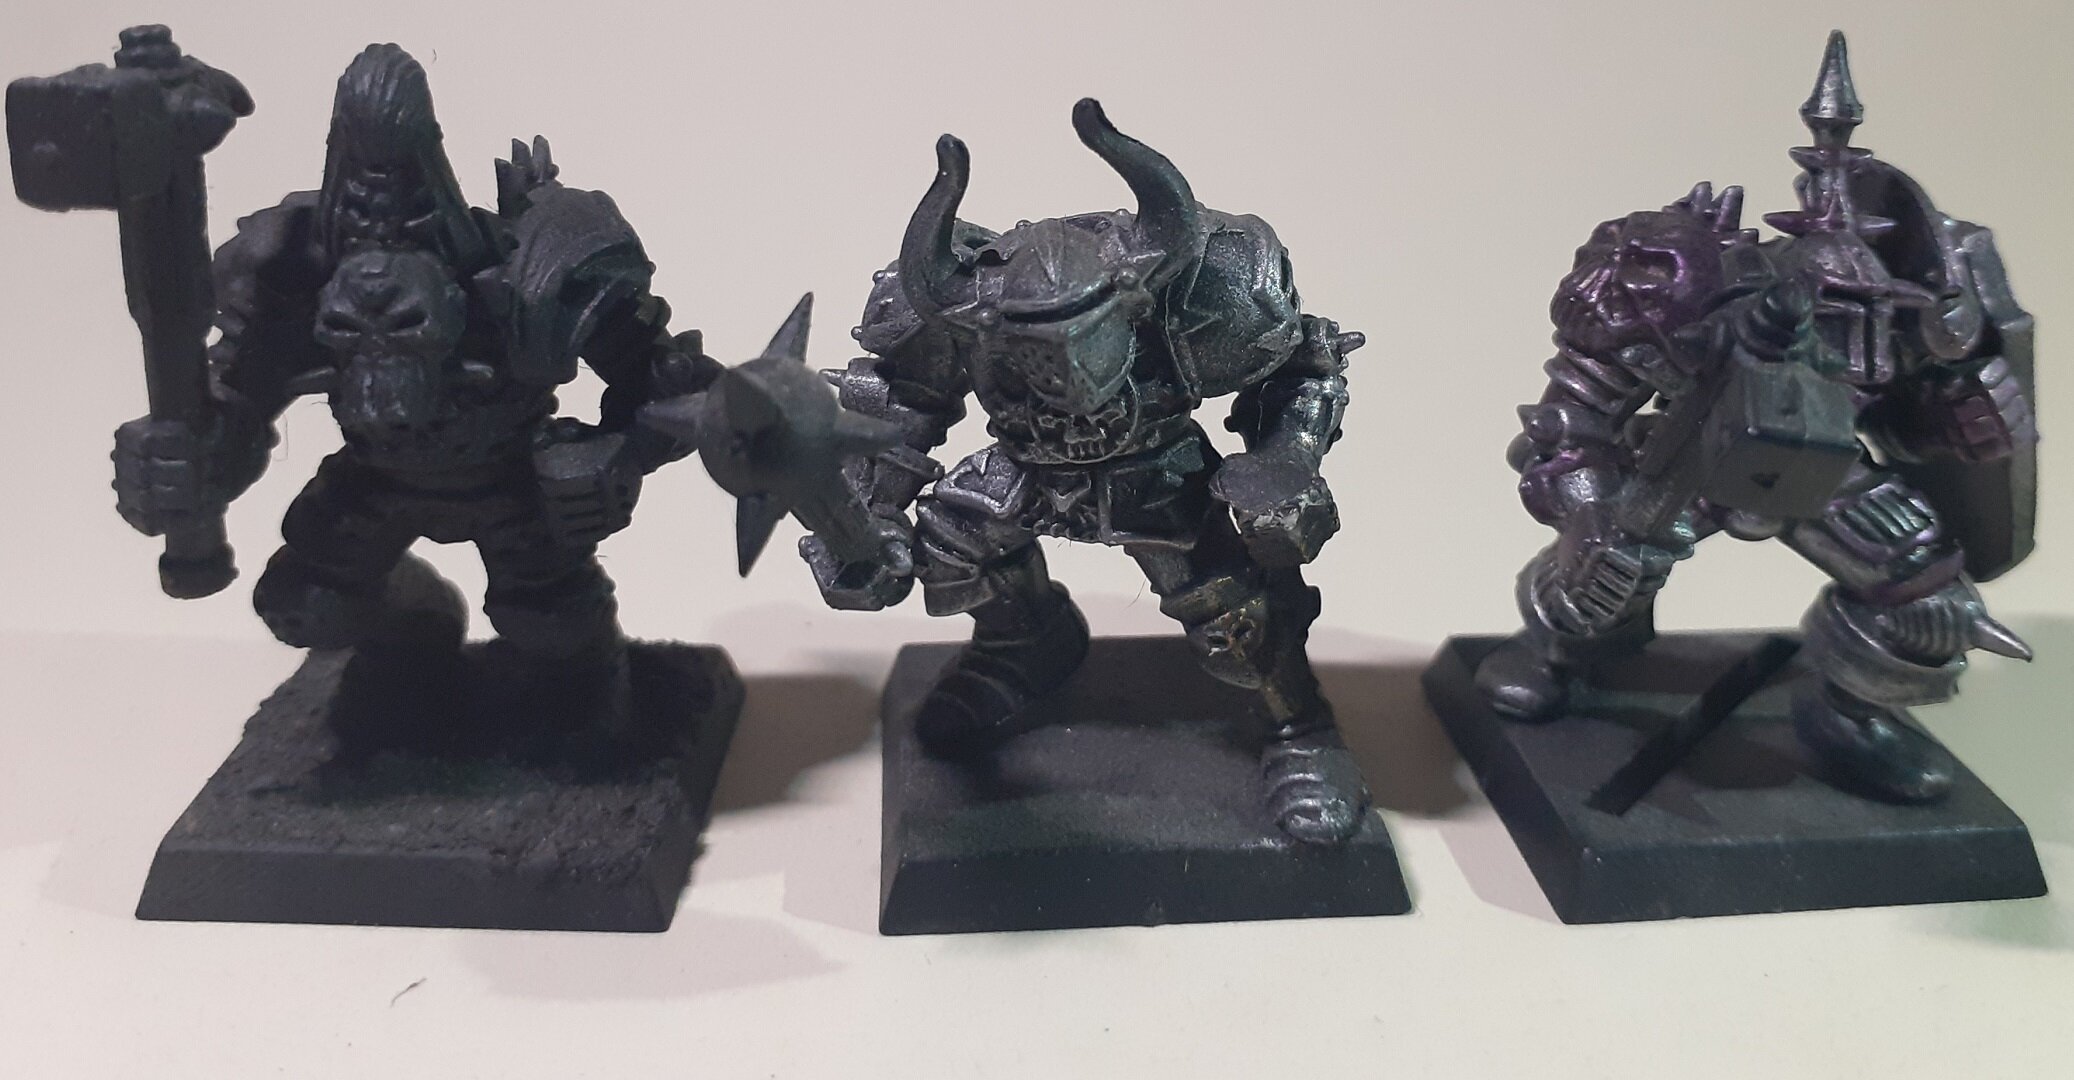
A dry brushing of gold paint forms an ideal base layer for the armour of this chaos warrior.
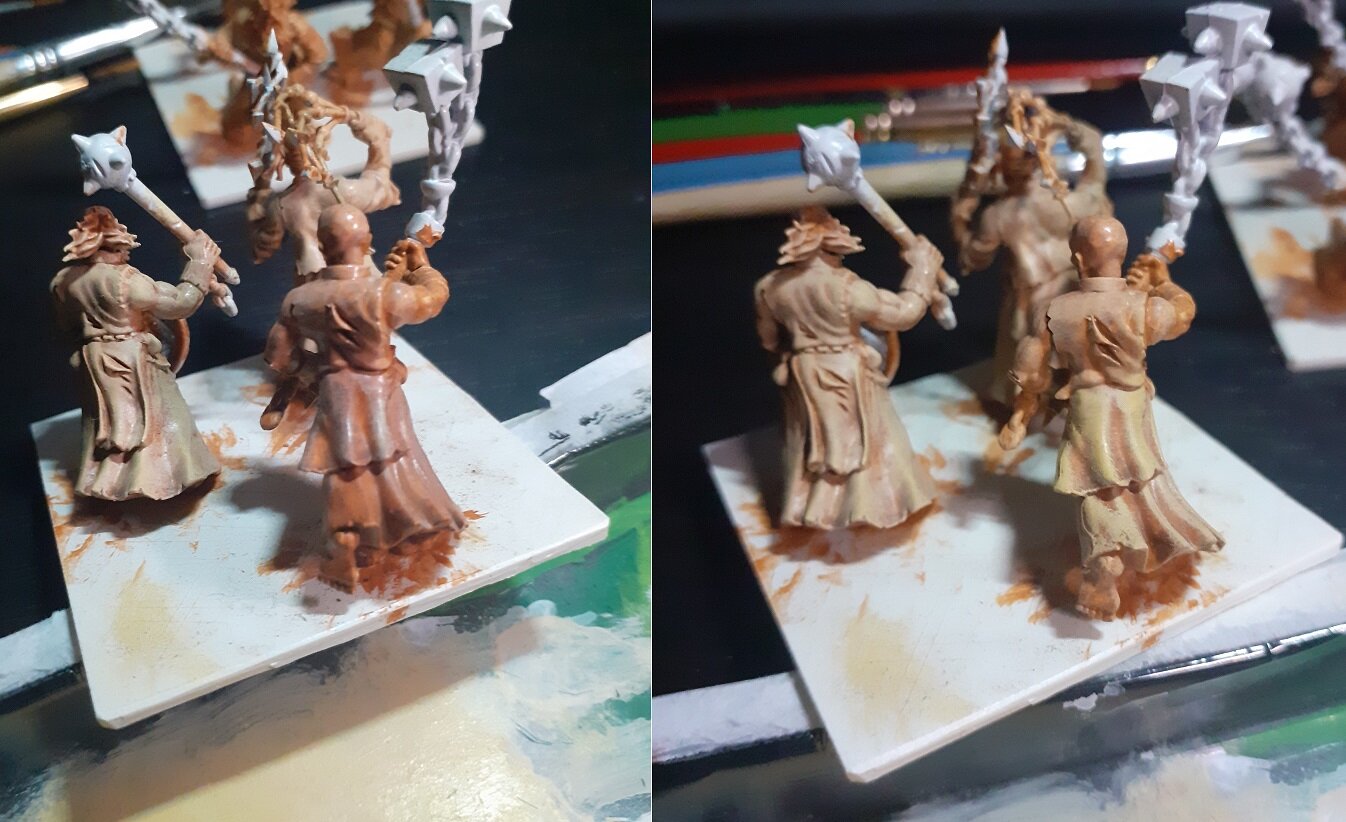
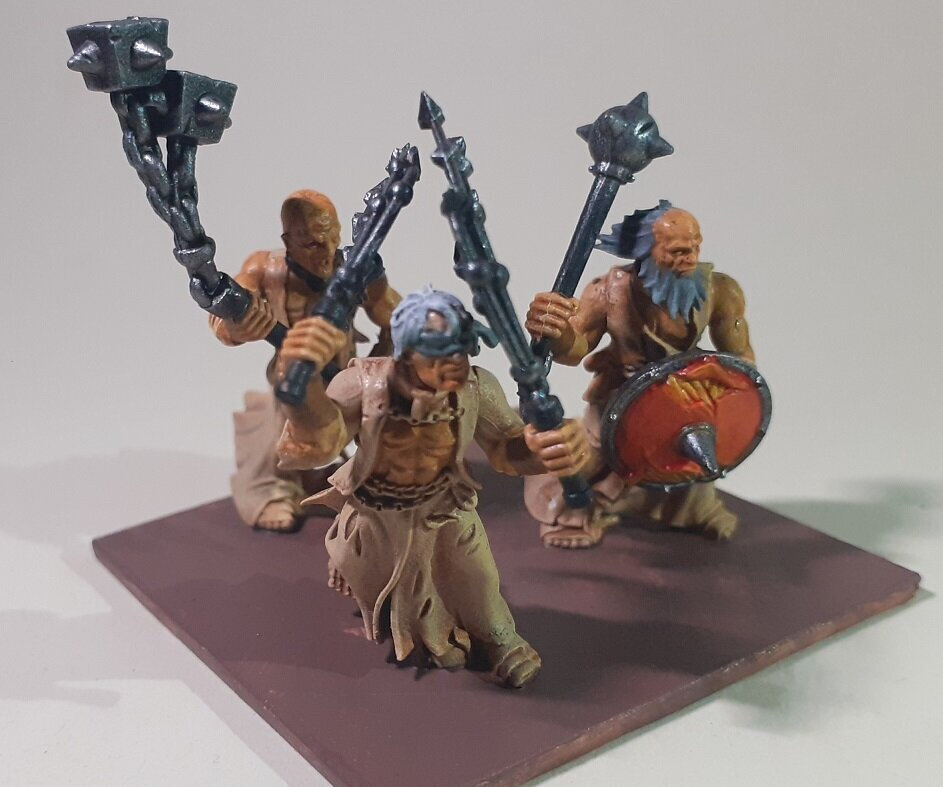
Drybrushing a light brown over the darker base coat brings definition to the robes and muscles of these chaos cultists (flagellant conversions using parts from chaos marauders).
When to Dry Brush
Dry brushing works best on models with plenty of texture because the technique relies on raised surfaces to ‘catch’ the paint. Large, flat surfaces need different techniques to avoid a rough finish, but I need to wait until I’ve got a suitable model on my painting table to do a write up on other techniques.
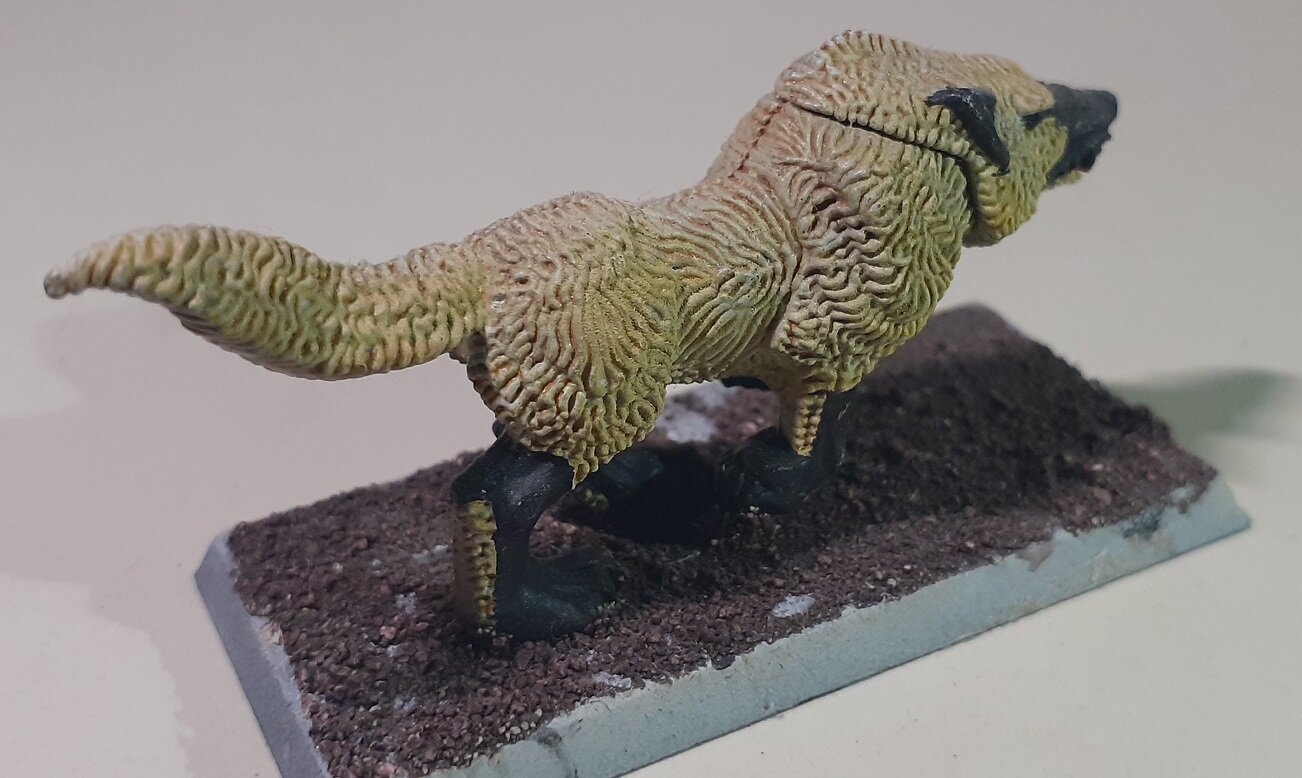
The fur of this direwolf is perfect for dry brushing as it has so many ridges to catch the paint. This fur was painted by applying a light brown wash over a white base coat, dry brushing with a very pale yellow, then applying a final wash of a darker yellow.
How to Dry Brush
Some painting guides recommend using a flat brush, but I’ve never had a problem using a round brush. In fact, my favourite brush for dry brushing is a soft, bushy brush that I’ve had for years. I can’t remember where I got it or what brand it is (any markings on it have long since rubbed off), but it has outlasted every brush I’ve owned.
When I first started dry brushing, I was taught to load paint to about halfway up the bristles then wipe most of the paint off on a tissue. I always felt this was a wasteful method and, over time, discovered a different approach
With as little paint as possible on the brush, lightly sweep the brush over the raised areas of the model.
First, I mix up a little of the highlight colour on my ‘palette’ (usually, the plastic cover off the last blister pack I bought) using one of my mixing brushes. Using my dry brush, I take a little from the edge of the mixed paint and work it out across the palette until there is little paint coming off the brush.
With the brush primed and ready, it’s time to start dry brushing. Drag the brush lightly over the raised surfaces of the area being highlighted. At first, it will look like nothing is happening, especially if the shades are very close to each other, but every stroke will deposit a little more paint. At first, it’s tempting to press the brush harder or use a little extra paint to speed up the process, but light strokes work better to build up the layers.
For the first layer, I often use a circular brush motion to catch all the raised edges. As the highlight layers build, I switch to brushing from one direction only, giving one edge a more prominent highlight. Often, I will also mix in a lighter shade of the highlight colour during this final stage to increase the effect.
The most important part of the dry brushing technique is to keep the brush dry. The moment you dip that brush in water to clean it, that’s the end of your dry brushing session. Even if you dry it out on tissue paper after rinsing, the brush will be too wet to use straight away, resulting in wet streaks. Either switch to another brush or paint a different model. I tend to drybrush three models then switch to detail painting or applying washes to the next three models while I wait for my brush to dry out enough to use.
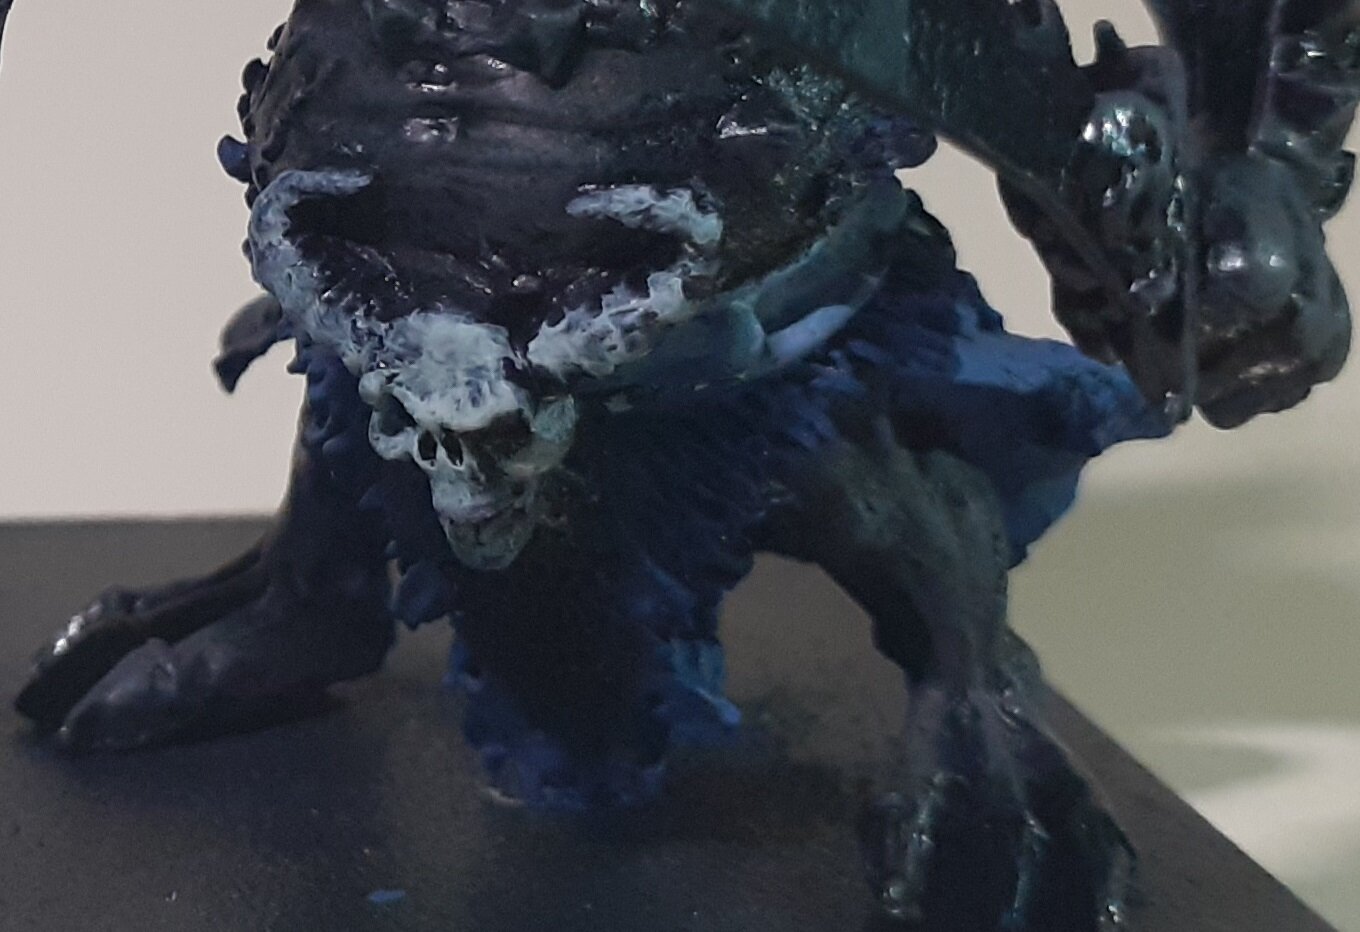
With each sweep of the brush, a little more paint is deposited across the back of this Kings of War Moloch, gradually building up from black to grey while leaving the recessess in shade.
The skull on this moloch was dry brushed using a brush that had been cleaned but not dried fully, resulting in a streaky finish.
The bigger the difference in shade between base coat and dry brush colour, the more quickly the highlights become apparent. Whereas the grey used to paint the moloch was close to black, requiring several layers to create a noticeable change, the shades of brown on the flagellants are so different that the highlight is noticeable after only a couple of sweeps.
That’s the basics of dry brushing. Use a brush loaded with the tiniest amount of paint, press lightly, build up the colour progressively, and add lighter shades to increase layer depth as you progress.
The armour of this chaos warrior was dry brushed before receiving a wash with brown paint to create a tarnished copper and iron colour scheme. The fur of the cloak was highlighted using a heavy dry brushing of a medium grey before receiving a very light dry brushing of a lighter grey around the very edges.
After being dry brushed, the skin of the cultists was given a wash with a light brown, darkening the highlighted areas to create a tanned look and settling into the recesses to further darken the areas untouched by the dry brushing.
Unlike most highlights, the weapons were first painted brown then heavily dry brushed with black. This resulted in small pockets of the lighter colour in the recesses. When combined with the iron highlights dry brushed over the top, this creates the illusion of tiny pockets of rust. Unfortunately, I couldn’t get them to show up on camera.
