Painting Basics: Washes
When I first started painting 28mm miniatures, using washes for shading seemed like a dark art. Blotchy patches and uneven blending ruined the first few miniatures I painted. As a result, I avoided using washes in any meaningful way for years. Easily done when painting chaos warriors as their armour is well suited to dry brushing. My first few warriors of Khorne were painted by dry brushing gold over the entire model then adding a splash of red ink to the shoulder pads. That approach was not going to cut it when painting up my demons.
The first of my models where washes were an extensive part of the paint job was this trio of Tzeentch Flamers, painted by progressively layering green paint over a white base coat and blending into the white by bringing each wash layer a shorter distance across the model.
What is Washing?
Washing is a way of using diluted paint to quickly add shade to a model, creating light and shadow effects. Combined with other shading techniques (refer to my article on dry brushing for more information), it can quickly bring extra depth to a model’s paint job.
My early forays into washes involved a simple wash of red in the recesses of my Khorne warriors’ armour. A quick and simple way to get an army painted for gaming.
When to Use Washes
Washing is a versatile method once mastered, but it works best on areas where there is deep detail. Large, flat areas can be washed, but it’s trickier to avoid blotching. Mostly, I use washes to blend a model that has been dry brushed, removing some of the roughness from the highlights, or create a shifting pattern of colour, such as on the Tzeentch demons in my examples below.
Thinning paints for washes results in a natural tendency for the colour to run into the recesses and cling to the edges of a miniature, leaving the raised areas looking lighter. The thinner the wash, the more the colour will drain away from high to low points in the model’s texture.
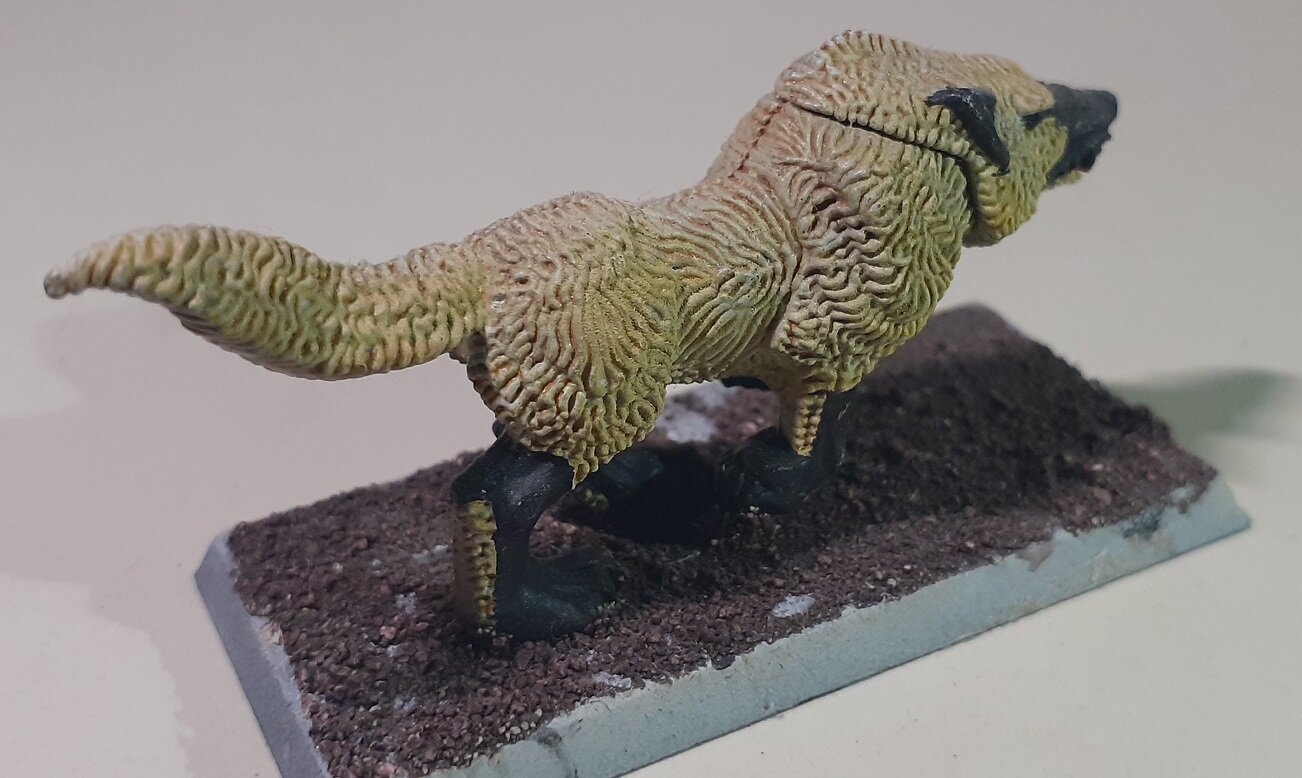
The fur of this direwolf is perfect for washes as it has so many recesses to hold the paint. This fur was painted by applying a light brown wash over a white base coat, dry brushing with a very pale yellow, then applying a final wash of a darker yellow.
The skin of these Tzeentch Horrors was painted entirely using washes. The yellow wash was gradually darkened using red paint as layers were built to create a blend of oranges and create shade. Red was gradually added to the blue wash to turn it purple and make the model look like its skin was shifting through through the colour spectrum, as befits a demon of change. In this way, the bulk of the model is painted quickly, leaving the details to be picked out with more precision.
How to Use Washes
Although it is possible to buy pre-thinned washes, I mostly water down my existing acrylic paints to create washes. Getting the mix right takes some trial and error, but don’t give up. The more you use washes, the easier it will be to judge how far to water down your paints.
With the paint thinned, work it over the recessed areas of the model, allowing it to gather in creases and pool along the edges where shadows would naturally form. You can either begin at the lowest point and drag up to the high points or start at the high points and drag down to the low points. I tend to vary between the two depending on the colour and texture of the model being painted.
If dragging up to the highlight, you’ll want to get as much of the colour into the recess as possible, then drag it up to create a blended fade to the darker colour. If the paint is thin enough, most of the colour will flow back into the recess. I tend to drag up to the highlight when using dark colours.
If you are dragging away from the highlight, you’ll want to apply the colour to the highest point of the model. Most of the wash will naturally run away from the raised area. By dragging the brush away from ridges and into recesses, you will be aiding to smooth the process and get an even blend of colour. I tend to use this approach more when dealing with lighter colours, or to add layers and depth to a model that has already been washed or dry brushed.
Add a little water at a time to a drop of paint until the desired viscosity is reached. I find it best when the colour is still vibrant but the consistency is bordering on water. You don’t want to get it so thin that you’re effectively painting with the water you clean your brush in.
I began the wash on this model by covering the larger, raised areas then dragged the paint into the creases to increase the quantity of paint in the areas where shade would be most needed. Adding more layers will smooth the transition and create a smoother blend.
After three layers, the right hand side of the model has gained a smooth blend from the raised areas to the slightly darker recesses, giving a natural skin-like transition in colour. Further emphasis could be achieved by lightly dry brushing the model and highlighting the ridges of the muscles and knuckles. The arm that has only had one layer looks blotchy as the wash has contracted as it dried, a common problem with washes.
When layering washes, it is important to let each layer dry fully. Painting over a wash that is still wet can lead to some interesting blending effects if done right, but will more likely result in a mess until you’ve built up experience in blending layers. I usually alternate between washing several models and dry brushing several models to give the washes time to dry.
These gnolls were painted with the same yellow as the demon, but the spearman was given a dry brush of a very pale yellow to highlight the tips of its fur, illustrating the difference between a highlighted unit and one that has only had washes applied.
The body of this efreet was painted using only washes, starting with yellow and progressively getting darker as more red was added for each successive layer. The flames were painted by alternating between dark green washes and light green dry brushing.
That’s the basics of painting using washes. Although it is possible to paint a model using only this technique, washing is best used in combination with other methods (see my article on dry brushing for more information).
The skin of this ogroid thaumaturge was painted using a mix of blue, pink and purple washes to make it look like the skin was morphing through the colour spectrum. After each wash, the model was drybrushed with white paint to help blur the colours together for the next wash.
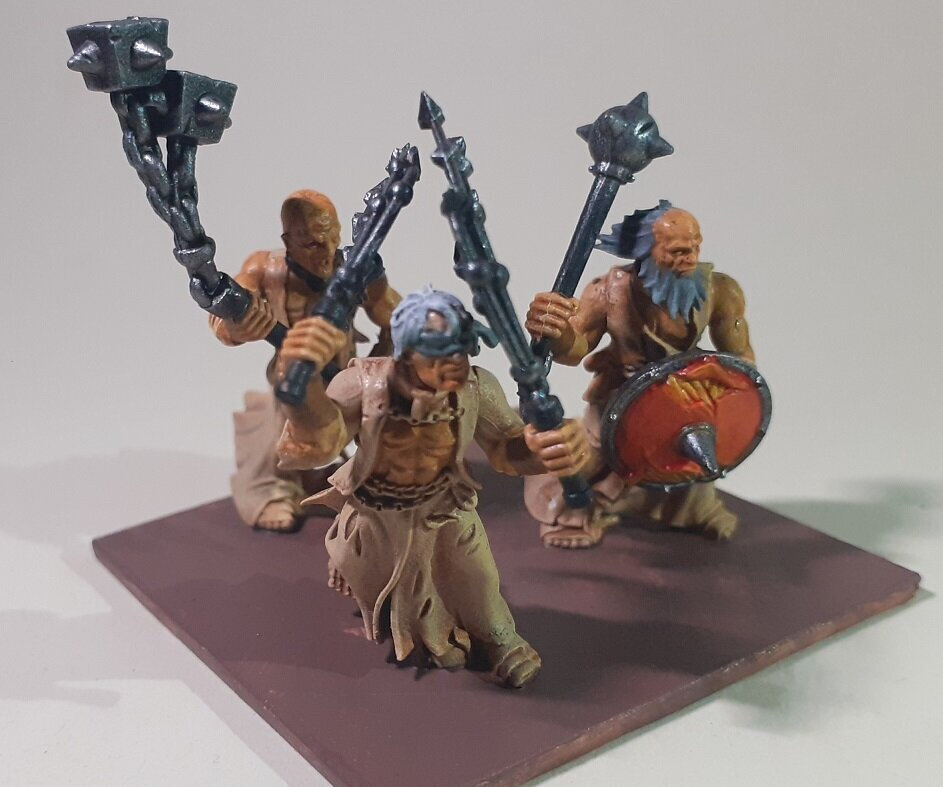
After being dry brushed, the skin of these cultists was given a wash with a light brown, darkening the highlighted areas to create a tanned look and settling into the recesses to further darken the areas untouched by the dry brushing.
The shield was painted by first washing the edges with red then blending up to the orange by thickening the wash with yellow paint as I moved closer to the centre of the shield.


